01 August 2016

Moodboard Monday: Sewing Studio Storage

Organizing a sewing studio can be a tricky, and seemingly never ending, task. Today I have some unusual and unexpected ideas to help corral your bits and bobs, all while looking good!

For me personally, I want my studio space to be beautiful as well as functional. I want an inspirational space that isn't too visually distracting. A studio where everything has a place and I won't waste time hunting for supplies and tools. And especially a place where I can focus on the work and not on how much I hate how disharmonious something looks or how hard something is to find.


I spent almost two solid months last year going through every last thing in my studio, category by category. It was the first time in over 15 years and it was time well spent. I gifted or donated things I no longer needed. I threw away art that I wasn't happy with, and I evaluated everything. And everything that stayed now has a home, I can lay my hands on anything at a moment's notice, and I make a concerted effort to put things back when I've finished using them. All of this is saving me time, aggravation, and money. It used to be easier to just buy another ruler/spool of thread/thread snips if I had searched all day and wasn't able to locate it. Need a blue seed bead or a gold ear wire, yeah, I've got that right here!


Because my studio is outside of my home in an old factory the public is frequently invited in, through workshops that I offer, a mentorship group that I lead, or during open studios that all of the artists in the building participate in. Plus my studio is a place where I spend a lot of time and I prefer spending it in a space that is pleasing to look at. My space is not only designed for working but can also be a classroom and a showroom (and a place to hang out and talk about art and eat ice cream, as one does...)

I've rounded up some containers and organizing items that you might find helpful when organizing your own studio. Links are provided below.


1. Bisley 5 drawer cabinet - This metal cabinet is the perfect size for a tabletop and the flat drawers hold a ton of little items like beads, threads, scissors, and more. There are even inserts for the drawers  available with different configurations of compartments to sort all of the little stuff out. Plus the cabinet comes in a range of luscious colors!

2. Rotating hardware bin - This metal bin spins around and can keep spools of thread, flosses, buttons, paint bottles, and glues right at your fingertips. 

3. CD or DVD cabinet - if you collect fat quarters or other small yardage amounts of fabric, then a CD cabinet can be your best friend. A cabinet like this uses less than a square foot of floor space, but holds a ton of fabric (neatly folded and easy to see, select, and use).

4. Picture ledge - Don't neglect the wall space when organizing supplies! A picture ledge or two (or four!) can easily store paint bottles, spools of ribbon, large cones of thread, and much more without using any floor space.

5. Glass curio boxes - lidded boxes can be beautiful to store colorful and pretty supplies like thread, washi tape, ribbons, even scraps of fabric. And the lids keep the dust out.

6. Watchmaker's cases - these little tin cases are ideal for beads and findings. The clear tops make it easy to find exactly what you're looking for, and they're so shallow that it's easy to scoop beads right out of them as you're working. They're available in a lot of diameters. I have four drawers full of beads in these cases in my studio and I LOVE them!

7. Sugar dispenser - this one is a little weird. I know you're wondering why and how, but stay with me. The humble yet classic sugar dispenser is perfect for twine, string, yarn, and thin ribbons. Simply pop a cone of string into the dispenser and feed one end through the pop-up top. Pull out what you need, trim it off, and leave the end sticking out and ready for next time. They're inexpensive so this is an extremely cost effective organizing tool, especially if you have a lot of string, yarn, or twine and use it frequently.

8. Magazine racks - using the wall space again, you can keep reference books, patterns, and magazines at hand with a magazine rack or two. Bonus points if there's a label holder on the front of the rack so you know what's where!

9. Kitchen rail systems - another storage-on-the-wall device, this time using a kitchen rail system. There are a wide variety of systems available with different components that you can add to them to create a system that's perfect for you. Use the hooks to hang rulers and scissors, cups can contain pencils and markers, shelves can hold pin cushions or adhesives.

A terrific and free space planning tool available for desktop computers and tablets (and even smartphones) is Roomle. You measure your room and then draw the walls of your space, add windows and doors, and then add furniture. You can resize the furniture to duplicate what you have (or what you're planning to acquire), then drag it around, rotate it, and figure out how best to lay out your studio. You can duplicate and save multiple versions of the same room to help decide which might work best for you. It certainly saves your back from actually lugging all of the furniture around! You can even switch to 3D mode and take a virtual walk around your room to see how it feels.

If you're looking for even more ideas for pretty studios and storage solutions, please visit my Studio Inspiration Pinterest board for more thoughts (and lovely pictures). What's your favorite unusual storage gadget? Scissors in a knife block? Bobbins in an ice cube tray? I want to hear all about it. Together we can organize all the things so we have more time to sew and paint!!

25 July 2016

Moodboard Monday: Here comes the sun(room)!

Do you have a sunroom, also known as a Florida room? I had one in my previous house and I commandeered it for my studio. It was a big, gloriously light-filled room with walls of windows on three sides and four skylights overhead. Most sunrooms in colder regions of the US, like here in the Northeast, are considered 3-season rooms, sometimes because they lack a heat source, and sometimes because all of those lovely windows make it difficult to keep warm. I consider it a fair trade-off to have a room flooded with sunlight that's usable most of the year.


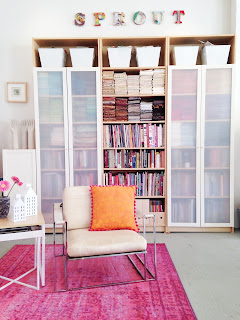
As I mentioned in a few previous posts, I've taken on some interior decorating clients and am having the time of my life. I love flexing my creative muscles, whether by designing and printing my own fabrics, teaching a class full of eager surface design students, or heck, even decorating cookies. Mmm, cookies... One of my favorite things to do for a client is to create a moodboard of the space they'd like help with. A moodboard is a mock-up of the major elements of a room so that the client and I can visualize what the finished room will look like. I decided to imagine that I was decorating a sunroom for myself and created the moodboard pictured here.

A lot of people tend to decorate a sunroom with a tropical or beach theme, but I prefer something more "placeless", a room that would fit in with the rest of my house, which isn't at all tropical or beachy. I would want it light and airy, breezy, and inviting, while remaining true to my modern, eclectic, artsy, global vibe. If you're decorating a sunroom, here are a few things for you to think about when choosing finishes, furniture, and accessories.

  • Consider lightening the floors - a bleached wood floor is light and airy looking and helps reflect all of that gorgeous sunlight.
  • Choose durable fabrics and materials - an indoor/outdoor carpet is a perfect choice for a sunroom.
  • Pick a light, pale color to bounce back as much of that natural sunlight as possible. Pay attention to the undertones in the room - do the colors of everything else in the room lean toward yellow, or red, or green, or blue? Try to match those undertones as best you can for the most harmonious result. For example, nearly all of the blues in my moodboard (from the walls to the rug to pillows to the painting) have a dose of green in them.
  • Add lots of texture for interest - smooth surfaces like glass or metal, nubby fabrics like raw silk and linen, rattan or wicker (in moderation or you'll tip over to tropical in a hot second!), and handwoven textiles for pillows and throws can bring another dimension to a room.
  • Make sure you have multiple light sources for after the sun sets too - a spectacular chandelier, a couple of floor or table lamps, and a few candles in lanterns can all extend the use of the room beyond the daylight hours.
  • Don't be afraid to mix wood tones or metal tones for a more eclectic look.
  • Use sheer linen or cotton curtains that will catch the breeze but stop the rays of the sun from getting in your eyes depending on the time of day. There's nothing so charming as a curtain gently wafting in a light wind.
  • Don't forget some plants and flowers to really bring the outside in, blurring the line further between outdoors and in.
  • Once autumn arrives swap out some of your easy, breezy accessories for ones with cozier textures like wool and velvet pillows, warm brass and gold accents, and more candles to maximum use out of what might end up being your favorite room in the house!

In case you're wondering where any of the items I've used on the moodboard came from, I've provided a shop-the-look list. Do you have a sunroom? Do you love it as much as I did mine? And don't feel sorry for me, my studio now is in an old factory so it has 10 foot ceilings and huge old factory windows - I'm still eating up that sunlight!! If you're looking for further inspiration, check out some sunny Florida real estate for additional ideas!


1. Shibori Dots Indoor/Outdoor Rug; 2. Antique Zinc Metal Riley Lanterns; 3. Seagrass Barrel Stool; 4. Capiz Lotus Pendant Chandelier; 5. Morning Walk Painting; 6. Hughes Sofa; 7. Ocean Basin Tray; 8. Perdana Coffee Table; 9. Sunshine Accent Chair; 10. Fransisco Wool Cube Pouf; 11. Amber Interiors Woven Pillows; 12. Diamond Star Gold Glass Vase; 13. Surveyor Floor Lamp
SaveSaveSaveSave

Printing on Fabric with Natural Materials starts now!

Does surface design summer camp sound like fun to you? Then join me in my online course Printing on Fabric with Natural Materials on Craft University! Registration is open through August 29.


The supplies needed are simple to find, non-toxic, and mostly inexpensive - and you'll be creating unique and interesting fabrics with everyday materials like artichokes, onions, ferns, lace, even fish!


Treat yourself, sign up with a friend, and work through the lessons. I'll be standing by to answer questions, lend encouragement, and dish even more tips and tricks.


Use coupon code PRINT20 for a 20% discount on the price of the class. See you at camp!


30 June 2016

Printing on Fabric with Natural Materials - online course!

Back at the beginning of May I took a trip out to the Denver area and recorded an online video workshop for Craft University called Printing on Fabric with Natural Materials. Working with the team there was a blast and I'm so proud of the content of this workshop.


In the workshop I teach you all about how to sun print with acrylic paints and inks, how to direct print leaves, fruits, and veggies, how to print 3D objects like seashells and bumpy leaves, how to print fish, and even how to print your own photos with UV reactive dyes.


The team put together a preview of the workshop and you can watch it here:


Printing on Fabric with Natural Materials starts on July 25 and runs through Sept 5, but you own it forever, in case your summer gets busy. But! If you want to play along in real time, I'll be around to cheerlead, answer questions and troubleshoot, and share some more fun tips, tricks, and resources. You all are encouraged to post photos from the lessons and ask as many questions as your heart desires. I'll be right there guiding you!


You can use coupon code PRINT20 to save 20% on the course, and I'll be giving away a free gyotaku rubber fish for printing on Facebook and Instagram, so make sure you friend and follow me there too!

Summer is the best time to Nature Print - head out into the backyard to gather some supplies and then come join me in class!