19 October 2011

Quilting Arts In Stitches blog tour

Thanks for visiting the last stop on the In Stitches Volume 5 blog tour! I am SO excited about this issue - there is an abundance of beautiful, intriguing, strong work and creative, innovative techniques.


One of the best parts of my job as editor is getting to know and to work with the artists in each issue. I am grateful to all of them for sharing their art and talent and time with all of us.

Some highlights from this issue:

Carol Ann Waugh has an interesting take on combining hand and machine stitching. I seriously want to explore the decorative stitches on my machine now! (Many thanks to my friend Vivien Zepf for telling about Carol and her work!)

Therese May shares her abundance quilts and inspires a challenge for our readers! Make sure you check it out - I think you'll be tempted to enter.

Barb Forrister makes the most beautiful, artistic three-dimensional flowers and her video is super informative. If you've never tried this, Barb is the perfect person to show you how.

Alma Stoller's fabric beads are fun and colorful and there are definitely some of these in my future too! I need to justify my bead-buying habit and her fabric beads are just the ticket.

Larkin Van Horn has inspired me to create a fabric reliquary. I'm thinking these embellished boxes would make fantastic containers for presents this holiday season as well as special containers for treasured items.

Cheryl Sleboda is on the cutting edge of technology as she introduces us to electroluminescent wire that lights up your quilts. You have to see this to believe it! There are light switches next to each of her quilts in the article so that you can see what the quilts look like with the wire on and off. 

Amanda McCavour creates the most sublime drawings in thread using just thread. Seriously, only thread! They're suspended in air and are Line in its most pure form. And she's so appealing in her video - I just want to hang out with her in her studio!

I hope you check out this latest In Stitches for your Mac or PC. 


I'm super excited to announce that it's now available for your iPad too! Just head to the App store and search for Interweave or Quilting Arts.

In case you missed any of the other stops on the blog tour, here's the complete line-up. I encourage you to see what else these talented artists are up to!

Monday 10/10 Lindsey Murray     http://quiltingdaily.com
Tuesday 10/11 Larkin Van Horn      http://blog.larkinart.com
Wednesday 10/12 Cheryl Sleboda      http://blog.muppin.com
Thursday 10/13 Alma Stoller      http://almastoller.blogspot.com
Friday 10/14  Therese May      http://theresemay.blogspot.com
Monday 10/17  Barb Forrister      http://barbforrister.com/category/blog
Tuesday 10/18  Carol Ann Waugh      http://carolannwaugh.com/blog/
Wednesday 10/19  Jane Davila     http://janedavila.blogspot.com

If you have an idea for In Stitches and would like to be in our emagazine, please visit the submissions page and send us your thoughts!

06 October 2011

Natural Solvent Transfers

Oh how I love Citrasolv natural cleaner and degreaser! Not only is it an awesome cleaner (you know, if we had time for cleaning!) but it is also a perfect solvent for transferring laser-printed images or photo-copied images to fabric or paper.


Supplies:
CitraSolv orange-based natural cleaner and degreaser
Toner-based laser print or photocopy (either black and white or color) printed onto plain copy paper, in reverse
Foam brush
Scissors
An old spoon or a burnisher
Paper or Prewashed fabric (the smoother the surface, the sharper the print)
Scissors

1. Cut the printed sheet apart into separate images, if you’ve printed more than one on the page. Make sure that the image is printed in reverse or mirrored as the transfer process reverses the printed image, This is especially important for text!

2. Place the image face down on the desired fabric or paper and hold firmly.

3. Moisten the foam brush with a small amount of CitraSolv. Be judicious, a little bit goes a long way. 


4. Rub the moistened foam brush onto the back of the printed image, being careful not to shift or wiggle the paper which will result in a blurry transfer.


5. Once the paper is saturated you will see the image start to show through the back of the paper. At this point, vigorously rub the back of the paper with an old spoon or a burnisher.

Tip: It can be helpful to work on a slightly padded surface. I often place a scrap piece of batting or an old mouse pad under everything.


6. Lift up one corner of your printed page to peek and see if the image is transfering. If it isn’t, let go of the corner and resume burnishing. If it has transfered, remove the printed paper.

Tip: Printed images can only be transfered once, so discard the saturated paper after you’ve completed the transfer.


7. If you allow the transferred image to sit out the CitraSolv will evaporate in a few hours. If you are in a hurry, cover the transfered image with parchment paper and lightly press with a warm iron. Make sure your work area is adequately ventilated as the odor will be concentrated and more intense with the heat of the iron.

 Finished piece with CitraSolv image transfer.


There are many different ways to transfer images and photos to fabrics and other surfaces. Using a solvent and a laser-printed copy is one of them. I prefer a natural, orange-oil-based solvent like Citra Solv for its non-toxic properties and its great smell. It’s essential that the image is printed on a toner-based laser printer or photocopy machine as an inkjet printer or solid ink laser printer won’t work.

13 June 2011

Jump Start Your Art Career!

It's back, just in time to get your art career started or moving along! Sign up for my 6-week online workshop starting Monday July 25. The online format is ideal for this type of information and boy, do I have a LOT of information for you!  More details below:


Jump Start your Art Career

What do you want out of your art career? Do you want to exhibit more often? Sell more art? Teach workshops? Get published? Create a polished, professional online prescence? This practical, hands-on class will guide you through an individualized course of study to attain these aspirations & more. Start by defining and setting your specific goals, create your brand, come up with a marketing plan and put it into action, all with step-by-step guidance from an industry expert.
Learn how to -
  •      create a brand that will help you stand out from the crowd
  •      outline a marketing plan to help you reach your goals
  •      put together a professional portfolio
  •      find, research and approach art galleries
  •      start an etsy store and promote it
  •      build up a mailing list and use it effectively
  •      analyze the success of your marketing plan
  •      get published - start small and think big 
With interactive lessons, homework, brainstorming, critiques and more you will be well on your way to realizing your art career goals.
On each of the six Mondays you will receive an email with the PDF lesson and worksheet for the week. The interactive part of the class will mainly be run from a private blog where everyone registered for class will have the opportunity to see the lessons in visual form, anyone comfortable with having the work they're doing for class will have it posted, and comments on each lesson will be highly encouraged to foster discussion, brainstorming and feedback.
The blog will have updates from me, relevant to that week's lesson, every weekday and I will be available for email consultation and help during the entire 6 weeks. The blog will remain available for three weeks after class has finished.
The PDFs and worksheets will help you focus on your own specific goals and the steps you will be taking to attain them, while the blog will help you track your progress, and your fellow students', with our real-life examples.

6 online lessons beginning Monday July 25 $75.00

the workshop includes pdf handouts, worksheets, resources and references plus a forum for sharing questions, answers and progress all in a supportive, encouraging and empowering environment.

This class is only run about every 15 months so jump if you're interested. It'll be a while before it's back again!


Please contact me if you have any questions. I hope to see you in class!

09 May 2011

Housing Starts

Last year, the uber-talented and enthusiastic Kathy York got a brainstorm to gather a group of artists to create a village of Fiber Houses. The resulting village is so vibrant and interesting, isn't it?


I built three houses for the project and at the time I thought they were on the large side, but looking at the village now I can tell they're not. My houses are in the center right in the village above.
First side of my pointy house 
Second side of my pointy house

Side one of my squatty house


Side two of my squatty house

Side one of my tall house
Side two of my tall house

I had a lot of fun playing with roof lines and proportion. Maybe it's my frustrated architectural tendencies?
Each of my houses is composed of both fabric and art/found papers and incorporates some printmaking.


Following along on the rest of the blog tour to learn more about the houses and their artists.

Susan Else (website) May 2 http://www.susanelse.com/
Frances Holliday Alford May 3 http://www.franceshollidayalford.com/weblog/
Pamela Allen (website) May 4 http://pamelart.homestead.com/titlepage.html
Frieda Anderson May 5 http://friestyle.blogspot.com/
Lisa Call May 6 http://blog.lisacall.com/
Vickie Hallmark May 13 http://fiberartglass.blogspot.com/
Laura Wasilowski May 23 http://artfabrik.blogspot.com/

PS: Sorry about the wonky formatting in this post. Blogger is being a pain in the patootie and won't bend to my will this morning...

08 May 2011

Sisters Oregon & A Quilter's Affair


This summer I will once again be teaching at the phenomenal Quilter's Affair conference in Sisters, Oregon. I am so looking forward to it! This event is really well-organized and the week is topped off by the most amazing outdoor quilt show.

This year I'll be teaching two sessions of my workshop, Project Patchwork. I love this class and I get to be Tim Gunn to all of the designers in the room. I issue three challenges throughout the day and participants create 3 small quilts using their favorite techniques. It's a tremendous amount of fun and very inspiring for all!

I'll also be teaching a Nature Printing workshop (with, among other goodies, rubber fishies!) and a nifty Stampmaking for Quilters workshop, plus an intense day I call Outer Limits where you'll learn more than 20 non-traditional ways to finish off the edges of your art quilts. Look Ma, No Binding!


I hope you can join me - the setting is glorious and the entire week is delightful.

21 March 2011

Surface Design Fun!

Today the C&T Publishing blog is featuring an easy pattern I designed. It's a simple, graphic tablerunner to showcase fabric that's been painted or stamped (or painted and stamped) or otherwise surface designed. Check it out here!


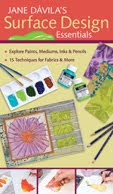
There are tons of ideas in my Surface Design Essentials book to add surface design to your fabric. It's a super handy book with a lay-flat spiral binding and wipe-off pages for those unexpected Jackson Pollock moments.

27 February 2011

Quilting Arts In Stitches - the magical mystery blog tour!

I'm so excited to be part of a super fabulous blog tour for the latest edition of the eMag, Quilting Arts In Stitches. If you missed the first issue, you'll want to go back and check it out and you'll definitely want to take a look at this second one as well! This is an entirely new and innovative product from the talented folks at Quilting Arts and, just like their print magazines, it's very high quality and jam-packed with both inspiration and useful information. There are videos to go along with the articles, so if, like me, you're a visual learner, then the videos of the artists you know and love working on hand and machine stitching techniques will be absolutely invaluable. Instead of just telling you how to do something, they'll show you how to do it! It's like having a team of experts right in your studio, ready to pause if you get interrupted, and replay over and over to catch every word.


If you read Quilting Arts and Cloth Paper Scissors magazines with your nose pressed against the page, trying to see more details and wishing that you could hold all those gorgeous quilts and projects in your hot little hands, then the high resolution slideshows of In Stitches are for you! Zoom in on each photo until you can see every tiny stitch. Get super up close and personal with the beautiful art like you never could before.

And! Dum-da-dum!! I have super exciting news to share!! I am the new free-lance editor of In Stitches starting with the next issue. We're already hard at work on it and there are so many lovely, talented artists contributing. If you have something you'd like to see in a future issue, or if you'd like to propose an article to write - send in an email. :)

Since Pokey is having a fun give-away on her blog, I decided to do one too! Leave a comment here and on Friday I'll draw a random winner for the February/March issue of Quilting Arts.

Don't forget to follow along on the blog tour and learn more about In Stitches

Tuesday: Lynn Krawczyk (March 1): http://www.fibraartysta.blogspot.com/
Wednesday: Jackie Cardy(March 2): http://dogdaisychains.blogspot.com/
Thursday: Deb Bates (March 3): http://stitchtress.wordpress.com/
Friday: Deborah Boschert (March 4): http://deborahsjournal.blogspot.com/
Saturday: Michelle Allen (March 5): http://allendesigns.typepad.com/
Sunday: Liz Kettle (March 6): http://textileevolution.com/?option=com_wordpress&Itemid=203
Monday: Lyric Kinard (March 7): http://lyrickinard.blogspot.com/
Tuesday (March 8): A surprise guest on Lindsey’s blog will be the final stop of this tour